How to get started with the horse ranch
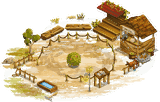
The horse ranch is a side farm you unlock for 50 000 farm dollars and 5900 gold, and it opens up a whole game system built around horses - the stable, training, tournament seasons and breeding on the cooperative horse pasture. I will show you what order to put the buildings up in, how training and tournaments work and what to watch out for when breeding, so your time and your resources do not go to waste.
Unlocking the ranch and its first buildings
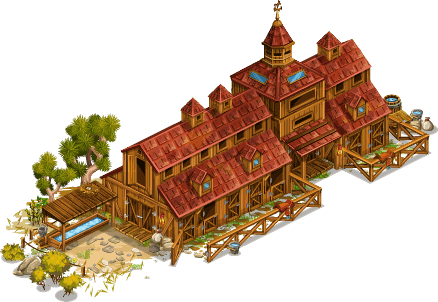
The horse ranch unlocks for 50 000 farm dollars and 5900 gold. Once you open the ranch, you do not get its buildings all at once - each one only unlocks at a certain farm level, so it is good to know in advance what is coming and not to waste resources on a building you cannot put up yet.
- Mine - available from level 7, can be upgraded up to level 5. You mine copper and tin ore in it for horse equipment (upgrading horse equipment itself is only available from level 60, though).
- Stable - available from level 15, can be upgraded up to level 12.
- Tournament transporter - available from level 15, can be upgraded up to level 7.
- Horse market - available from level 20, it only has one level.
I would build the stable first, because without it your horses are not going anywhere, and the mine right after it if you are planning to make your horse equipment from your own ranch's resources.
The stable and what you keep an eye on there
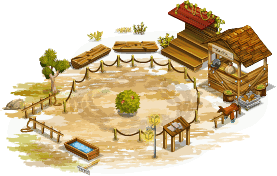
The stable gives you an overview of every horse you own - you will find their traits, their generation and whether one of them is currently away on the pasture or at a tournament. The more you upgrade the stable, the more horses fit into it, which comes in handy once you start breeding regularly, because a horse sent to the pasture has its stall in the stable locked for the time being.
Do not worry about maxing out the stable early on. A few stalls more than the number of horses you currently have is enough, and you can raise the level gradually as you pick up new horses from breeding or from the horse market.
Training horses with horseshoes
Training takes place on three tracks and each one improves a different horse attribute.
- Gallop track - trains endurance.
- Circular track - trains agility.
- Jumping track - trains strength.
You pay for every training round in horseshoes and use the slider to pick how many you put into it - regular training costs less, intensive training costs more but brings in more training points. Upgrading the individual tracks gets you more points out of training and also lets you put more horseshoes into a single round, so upgrading the tracks pays off mainly in the long run.
All three attributes of a horse add up and determine how quickly it reaches the first obstacle or task - which is why it pays not to train just one track to the max but to develop the horse evenly, if you want to enter it in every tournament discipline.
Tournament seasons and choosing a discipline
In the horse tournament season you choose between three disciplines - show jumping, racing and dressage. In each discipline you pick from three competitors, and each of them has their own course, their own rewards and a different difficulty. A course is made up of three obstacles (in jumping and racing) or three tasks (in dressage), and the horse that gets through them in the shortest time wins.
At every obstacle the horse reacts in one of three ways - normally, at a gallop, when it is faster, or with a hesitation, when it is slower - and the chance of each one is roughly 33%, unless breeding effects or equipment change that. Before a tournament you can kit your horse out with up to three pieces of horse equipment, each from a different category (saddles, saddle pads, riding helmets, riding boots and chaps) - equipment can improve how the horse behaves, strengthen or swap out a breeding effect, add a new effect, or increase the rewards from the competition.
Placing in the competitions earns you horse badges, which you will need for other tasks on the ranch, so even lower placements are worth having, not just first places.
Breeding on the cooperative horse pasture
Breeding happens away from the ranch, on the cooperative horse pasture, where you cross your horse with horses belonging to other members of the co-op. Here is how it goes.
- Send your horse to the pasture - its stall in the stable stays locked until the horse comes back or until breeding ends.
- Look after it with the ten available activities. Each one earns you breeding hearts that fill up the breeding meter - some activities suit the daytime better, others the night, so it pays to watch the activity history and look for the best combination.
- Once the meter is full, you get a choice of three random horses from your co-op mates as possible breeding partners. If none of them suits you, you can spend village dollars to be offered another three.
- Pick a partner and distribute the genes on the talent circle, which has nine segments of four cells each - every segment stands for one trait or breeding effect.
The more your horse and its partner have in common in their traits and breeding effects, the more cells in the circle are active and the more genes you get for the match - up to 50 per segment, and if both horses have exactly the same type of trait or effect, you get double. More genes in a segment means a better chance that the trait or effect shows up in the foal.
Besides co-op horses, you can ask Rose McLundy for a wild horse from the prairie behind the ranch (available from level 16, once the ship has been loaded) - either you let Rose suggest a horse based on how the pointers currently stand, or you specify the traits you want straight away. The second option is faster, but it costs you the chance to keep filling the meter or to choose between other partners.
What to watch out for when breeding
- The breeding meter can be filled up to 27 times and each time it fills, one cell in the circle is activated no matter what traits the horse has - if the first set of pointers does not suit you, feel free to put breeding off for a round and have another combination offered to you.
- A horse stays on the pasture for at least a week and will stay there as long as you keep looking after it. If you do not care for it for a whole week, it comes back to the stable on its own without a bred foal.
- For a breeding effect you need both parents with a breeding value of 10 or higher - and if both of them have it, the foal can also get an extra randomly chosen breeding effect on top.
- Every newly bred foal is one generation above its parent (a horse from the stable starts out as generation 0), and higher generations need more activities on the pasture, so breeding gradually takes longer.
- If there are not many horses on the cooperative pasture, you have no chance of collecting the full 100 points into every segment of the circle - tell your co-op mates to send more horses, because the more there are, the better the partners you have to choose from.
Buildings and products mentioned in the text
Back to Guides.