Horse breeding at the horse pasture
Horse breeding takes place at the cooperative's horse pasture, where every member can send one of their horses to be crossed with the horses of the others. The goal is a foal with better basic traits or with new breeding effects than the original horse had. Before you get to the crossing itself, you have to look after your horse at the pasture, collect breeding hearts and split genes between the improved traits.
Breeding pays off mainly in an active cooperative that regularly sends enough horses to the pasture - the more partners you have to choose from, the better your chance of a match and of the full number of genes per segment. In a small or inactive cooperative you run into the limit on how many horses fit on the pasture and you will never get the most out of breeding.
Breeding takes place at the cooperative's horse pasture
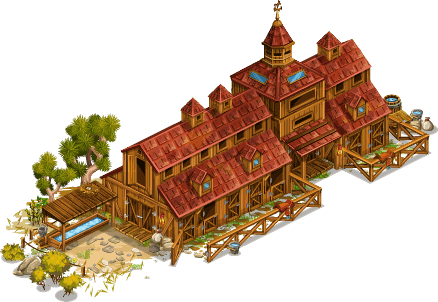
At the cooperative's horse pasture every member can place one of their horses. Once you send a horse to the pasture, its stall in the stable stays locked until the horse comes back or until the breeding is finished. From all the horses the cooperative members send there you then pick a suitable breeding partner for your own horse.
A horse stays at the pasture for at least one week. If you do not care for it the whole time, it goes back to the stable on its own with no offspring. It pays to plan for that in advance and to send a horse to the pasture only when you are ready to give it regular attention.
Ten activities fill the breeding meter with hearts
To even get to picking a breeding partner, you have to do activities with your horse at the pasture. There are ten of them and each one earns you breeding hearts that fill the breeding meter. How many hearts an activity gives depends on the order you do them in - some pay off more during the day, others at night.
The activity history shows which combination and order earned you the most hearts, so you can use it to plan a better run next time. With higher generation horses, collecting hearts also takes longer, because they need more activities.
The talent circle and genes decide how good the foal is
In the middle of the breeding screen there is a talent circle with nine segments - each one stands for one basic trait or breeding effect of the horse. Every segment is further split into four cells, and the more of them are active, the more your horse resembles the breeding partner in that trait.
Once the breeding meter is full, three hands on the circle show which traits or effects can be improved in this round of breeding. For every match you get genes - and if both horses have the same trait or effect, the number of genes doubles. More genes means a better chance the foal is born with better traits.
| Situation | Genes per segment |
|---|---|
| Match on only one of the horses | up to 50 |
| Match on both horses (same trait/effect) | up to 100 (double) |
| Charging the meter again without a new partner | up to 27 charges, max. 100 genes per segment in total |
Three options when the hands do not point at what you want
If you do not like what the hands are pointing at right now, you have three options.
- Ask the cooperative for more horses. The more horses there are to choose from at the pasture, the better the chance of finding a partner with matching traits - and without enough horses on the pasture you cannot even reach the full number of genes per segment.
- Put the breeding off and keep caring for your horse. The meter has to be filled again, but the hands may move to more suitable traits. It can be charged up to 27 times and every charge activates one cell in the circle regardless of the horse's traits, so you can collect more genes with each round.
- Ask Rose McLundy for a wild horse. Rose catches you a horse exactly to your needs, but after that you can neither fill the breeding meter any further nor pick other partners.
I like to go for the first option myself for as long as I can - asking the cooperative for more horses costs nothing and it only raises the chance of a good match.
Picking a partner, splitting the genes and the crossing itself
Once the meter is full, three random horses from your fellow cooperative members are offered in the top right of the screen. The best partner has the same basic traits, the same breeding effects and a similar breeding value as your horse. If none of the three suits you, another set of three suggestions can be bought for village dollars.
After picking a partner you move on to the gene distribution panel, where you see the three traits or effects the hands were pointing at. The foal inherits all the stats of the original horse plus these improved traits - how many genes you assign to each trait with the slider changes the chance that it really shows up in the foal. Once you click the Breed button, the new foal appears straight in the stable.
A horse sent to the pasture as a partner is not lost to its owner in any way - it stays on the pasture until its owner breeds their own foal.
Horse generations, breeding effects and the pasture level
Every horse from the stable starts out as generation 0. A newly bred foal is always one generation above the horse sent to the pasture, and the higher the generation, the more activities and time the breeding takes.
You only get a breeding effect when both parent horses have a breeding value of 10 or more - without that the effect does not carry over to the foal. If both parents have a breeding value above 10, the foal also gets one extra randomly chosen breeding effect. Bred horses also have lower training costs than horses from the stable.
The horse pasture gives access to all six breeding effects and their upgrades - if a horse has one effect several times, at the pasture it counts as a single effect with the values added up. The pasture level decides how many horses the cooperative can send there, the highest breeding value and quality level a horse may have and how many breeding effects it can have at once - so it pays to upgrade it step by step as the cooperative makes more use of breeding.